Making a foam air filter is simple and cost-effective. It ensures your engine runs smoothly and lasts longer.
DIY foam air filters can save you money while giving you control over quality. Many people prefer making their own filters as it allows for customization to specific needs. Foam air filters are excellent for trapping dirt and debris, helping to keep your engine clean.
In this guide, you will learn how to make your own foam air filter. We’ll cover the materials needed and the steps involved. With a little effort, you can create an efficient filter that improves your engine’s performance.
Ready to get started? Let’s dive in and make that foam air filter!
Materials Needed
To make a foam air filter, you need some basic tools. A sharp pair of scissors is essential. You also need a ruler to measure the foam, and a marker to mark the cutting lines.
You will also need glue to stick parts together and a container to hold the foam. Wearing gloves can help keep your hands clean. Make sure you have all these tools before you start.
The right foam makes a big difference. Look for foam that is porous but strong, allowing air to pass through easily. Avoid soft foam, as it can tear easily.
Check if the foam is resistant to oil and water—this will help the filter last longer. Ensure the foam is easy to cut and shape and fits well within your container.
Preparing the Foam
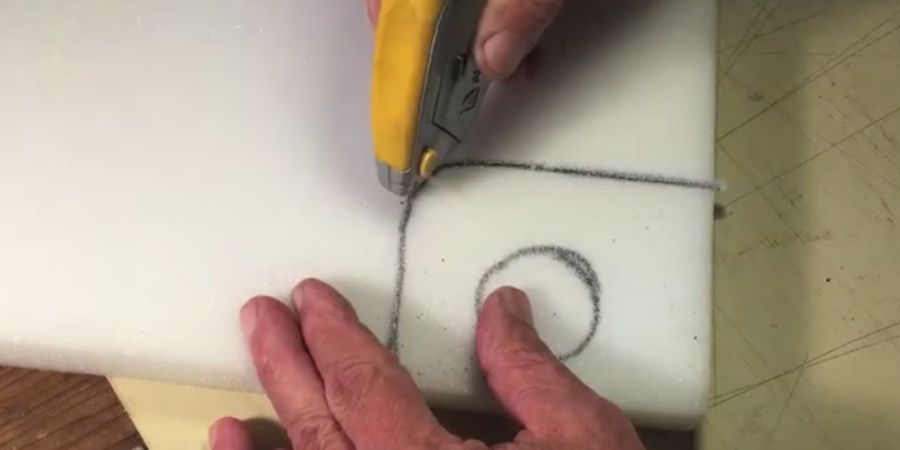
Choose thick, firm foam. Measure the space for the filter and mark the measurements on the foam. Use a sharp knife to cut it, ensuring a smooth and even cut. Trim any rough edges with scissors.
Round the corners of the foam to help it fit better. Use sandpaper to smooth the edges, as a smooth edge seals better. Check the fit of the foam and adjust if needed to ensure a snug placement.
Assembling the Filter
Assembling the filter involves securing the foam inside the frame. Ensure the foam fits snugly without gaps, and attach the cover firmly to keep it in place.
Layering Techniques
Start with a clean work area. Lay the foam sheet flat and cut it to fit the filter frame. Apply a thin layer of glue to one side, then place a second foam sheet on top. Press it down firmly to eliminate gaps.
Repeat this process until you have three layers. Let the glue dry completely to create a strong filter.
Securing The Foam
Place the foam in the filter frame. Make sure it fits well. Use clips to hold the foam. Check each corner. Add extra glue if needed. Let it dry for 30 minutes. Test the filter by blowing air through it. Ensure it stays in place. Now, your foam air filter is ready to use.
Applying The Oil
There are different types of filter oil. The most common are mineral oil and synthetic oil. Mineral oil is cheaper. Synthetic oil is more expensive but lasts longer. Both types can protect your filter well. Choose the one that fits your needs. Always check the label for proper use.
First, clean the filter. Make sure it is dry. Pour oil onto the filter. Spread the oil evenly. Use your hands or a brush. Do not use too much oil. Just enough to cover the foam. Squeeze the filter to remove extra oil. This helps the oil spread better. Let the filter sit for a few minutes. This allows the oil to soak in. Now, your filter is ready to use.
Installation Process
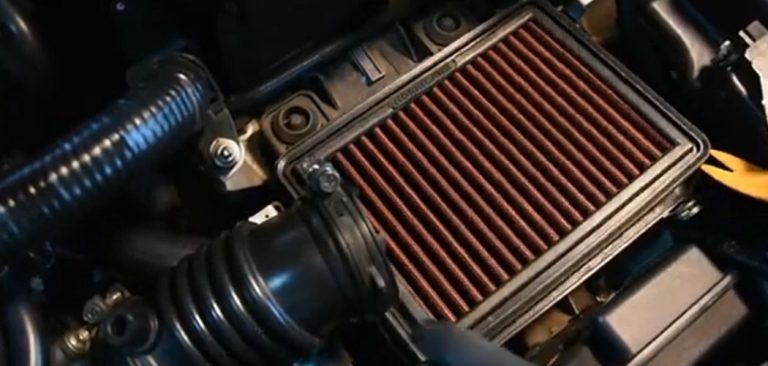
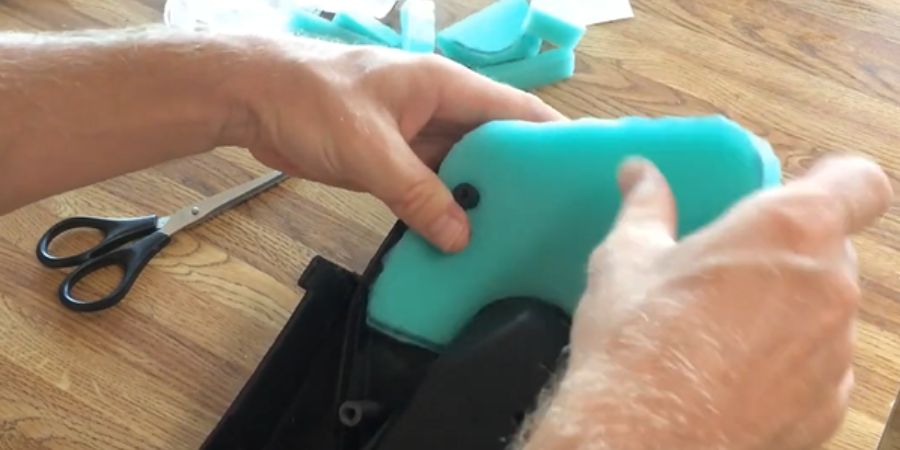
First, locate the air filter slot. It should be easy to find. Insert the foam filter into the slot, ensuring it fits tightly. The filter should cover the entire opening. If necessary, adjust it for a proper fit. The foam should not be loose, as a loose filter will not function effectively.
Press the edges of the foam filter to help it seal in place. Check all sides for gaps—there should be no open spaces. A tight seal ensures cleaner air for your engine.
Use your fingers to press down any loose edges. If the foam is too big, trim it with scissors, ensuring a straight cut for a proper seal.
Maintenance Tips
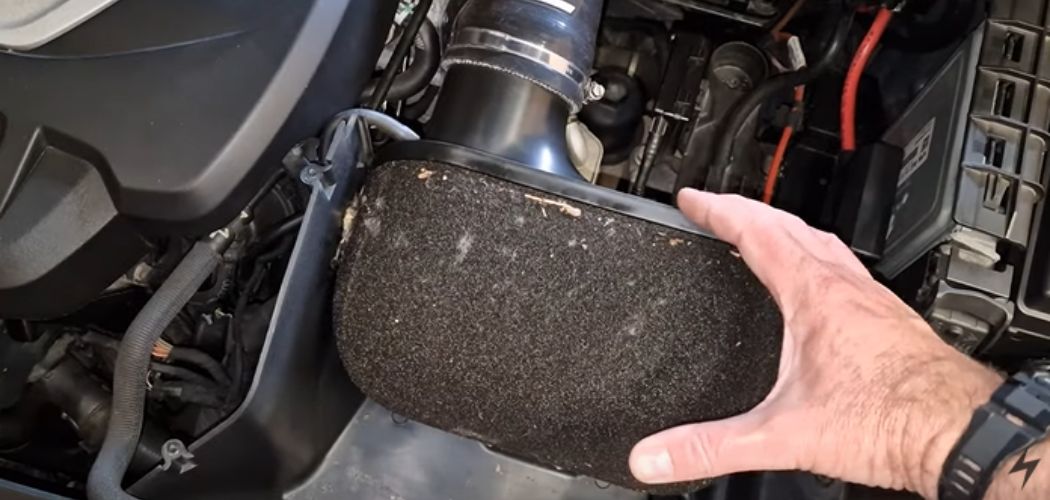
First, remove the foam air filter from the machine. Rinse it with warm water to remove dirt and debris. Use a mild detergent for deep cleaning. Gently squeeze the foam to remove excess water—do not twist or wring it, as this can damage the foam.
Allow the filter to air dry completely before reapplying oil. Make sure there is no moisture left in the foam before proceeding.
Reapplying Oil
Once the foam is dry, reapply filter oil. Use special oil designed for foam filters. Pour a small amount onto the foam and gently work it in to ensure even distribution.
Squeeze out any excess oil. The foam should be lightly oiled, not dripping. Finally, reinstall the foam filter into the machine.
Common Mistakes
Over-oiling a foam air filter can cause many problems. The filter can become clogged. This blocks air flow. Your engine may run poorly. Too much oil can also damage sensors. Use only the amount of oil needed. Spread it evenly. The filter should be damp, not soaked. Always follow the manufacturer’s instructions. Check the filter regularly. Clean and re-oil when needed.
A foam air filter must fit well. A loose filter can let in dirt. This can harm the engine. Measure your filter carefully. Make sure it matches the air box. Check for any gaps or spaces. Use proper sealing grease if needed. A tight fit ensures clean air for your engine. Always double-check the fit before use. This keeps your engine safe and running well.
Frequently Asked Questions
What Materials Do I Need to Make a Foam Air Filter?
To make a foam air filter, you need foam sheets, a sharp pair of scissors, and strong adhesive or glue. A ruler and marker will help with precise measurements, and a template can ensure accurate cutting.
How Do I Cut the Foam for the Filter?
Use sharp scissors or a utility knife to cut the foam into the desired shape. Make sure to follow the marked measurements for accuracy. Cutting smoothly and evenly will help the filter fit properly and function effectively.
Can I Wash and Reuse a Foam Air Filter?
Yes, you can wash and reuse a foam air filter multiple times. Rinse it with warm water and mild detergent, then let it dry completely before reapplying oil. Proper maintenance can extend the filter’s lifespan and keep it functioning efficiently.
How Often Should I Replace a Foam Air Filter?
It is recommended to replace your foam air filter every 6 to 12 months, depending on usage. If the filter becomes excessively dirty or damaged, replace it sooner. Regular cleaning can help prolong its life, but worn-out filters should always be replaced.
Is It Cheaper to Make My Own Foam Air Filter?
Yes, making your own foam air filter is generally more cost-effective than buying one. DIY filters allow for customization and better quality control. With the right materials, you can create a filter that suits your needs while saving money.
Conclusion
Creating a foam air filter is simple and cost-effective. You save money and gain valuable skills. Follow the steps carefully for the best results. Keep your tools handy and your workspace clean.
Your engine will thank you with improved performance. Regular maintenance extends the life of your filter. Enjoy cleaner air and a smoother ride!
You now know how to make a foam air filter. Happy crafting and safe travels!