Removing oxidation from car paint by hand is simple. You need a few tools and some effort.
Oxidation can make your car look dull and old. It happens when the paint reacts with air over time. You don’t always need fancy machines to fix this issue. With a bit of work, you can restore your car’s shine.
This guide will show you how to tackle oxidation by hand. We’ll cover the steps and tools you need. By the end, your car will look much better. Ready to bring back that showroom shine? Let’s get started!
Materials Needed
Removing oxidation from car paint by hand can be a fulfilling task. It not only restores the car’s shine but also extends its lifespan. To achieve the best results, it’s crucial to have the right materials. In this section, we will break down all the essential items you need to tackle this project effectively. Let’s dive into the Materials Needed for removing oxidation from your car paint.
Cleaning Supplies
Before you start polishing, your car needs to be clean. A spotless surface ensures that you don’t rub dirt into the paint, which can cause scratches. Here’s what you need:
Car Wash Soap: A good quality soap designed for cars will do the trick. Avoid using household detergents as they can strip away the paint’s protective layer.
Buckets: Use two buckets—one for soapy water and one for rinsing. This helps prevent dirt from getting back onto your car.
Microfiber Towels: These are gentle on the paint and very effective at picking up dirt.
Water Hose: You’ll need a hose with a spray nozzle to rinse off the soap and dirt.
Polishing Tools
Once your car is clean, it’s time to focus on removing the oxidation. This part requires a bit more effort and the right tools to make the job easier and more effective.
Clay Bar Kit: A clay bar helps remove contaminants that washing alone can’t get rid of. It leaves the paint smooth and ready for polishing.
Polishing Compound: This is the main ingredient for removing oxidation. Look for a compound specifically designed for oxidized paint.
Applicator Pads: Use foam or microfiber applicator pads to apply the polishing compound. These pads help distribute the compound evenly.
Car Polish: After removing the oxidation, use a good quality car polish to bring back the shine.
Soft Cloths: You’ll need these for buffing off the polish and giving your car that final gleam.
Having the right materials can make all the difference in your car detailing project. With these items on hand, you’re well on your way to achieving a professional finish without the professional price tag!
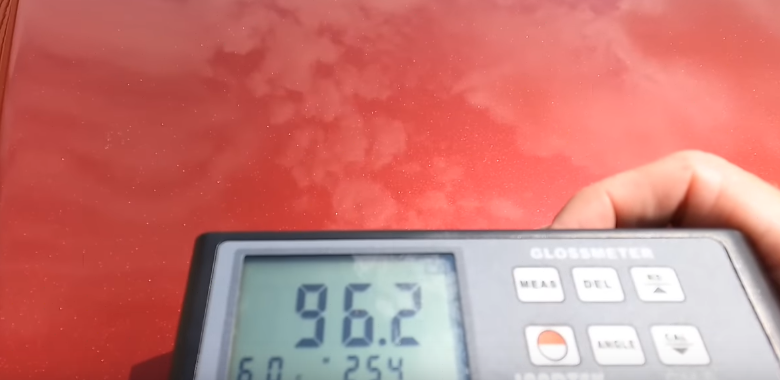
Initial Assessment
Begin by assessing the condition of the car paint. Identify areas with visible oxidation. This helps in choosing the right cleaning method.
Before removing oxidation from car paint, assess the damage first. This step ensures the right approach and materials are used. Check the paint surface in good lighting.
Identifying Oxidation
Oxidation appears as a dull or chalky layer on the paint. It often makes the car look faded. Run your fingers over the surface. If it feels rough, oxidation is present. White or chalky residue on your fingers is another sign.
Severity Levels
Oxidation has different severity levels. Light oxidation affects only the surface. It can be polished out easily. Medium oxidation penetrates deeper but can still be removed by hand. Heavy oxidation may require professional help. Identify the severity to choose the correct method. “`
Preparing Your Workspace
Before you start removing oxidation from your car’s paint, it’s important to prepare your workspace properly. A well-prepared space ensures you can work comfortably and efficiently. Here are some steps to get you started.
Choosing A Location
First things first, you need to find a good spot to work. Look for a place that is shaded, like a garage or under a tree. Direct sunlight can make the paint too hot, which is not good for the process. Also, make sure the area is clean and free of dust. You don’t want any dirt sticking to your car while you work.
Gathering Equipment
Next, gather all the tools and materials you’ll need. Here’s a simple list to help you:
Car Wash Soap: To clean the car before you start.
Microfiber Towels: These are soft and won’t scratch the paint.
Clay Bar: This helps remove any contaminants on the surface.
Polish: To remove the oxidation and bring back the shine.
Applicator Pads: For applying the polish.
Bucket and Water: You’ll need this for washing the car.
Wax: To protect the paint after polishing.
Having everything ready before you begin can save you a lot of time and hassle. There’s nothing worse than getting halfway through a job and realizing you need to run to the store!

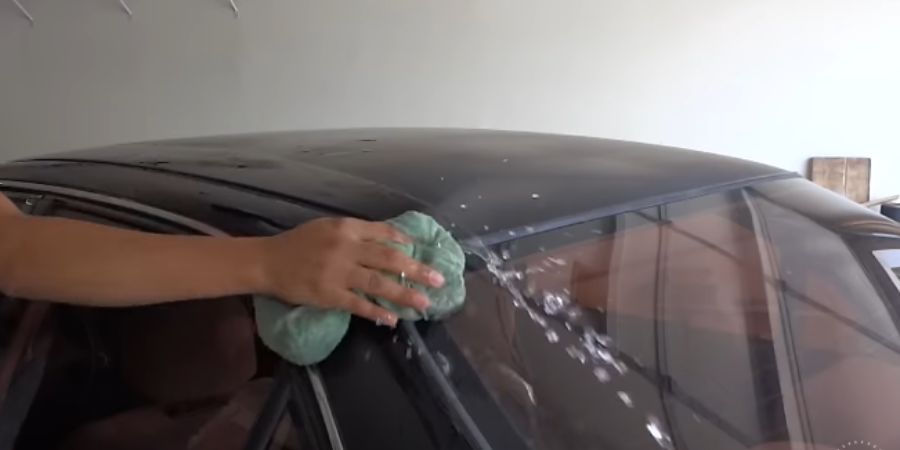
Washing The Car
Before you start removing oxidation, wash your car. This step is crucial. It removes dirt and grime. Clean surfaces make oxidation removal easier. A thorough wash ensures better results. Follow these simple steps to wash your car properly.
Rinsing The Surface
Start by rinsing the car with water. Use a hose or a pressure washer. Begin at the top. Work your way down. This helps in removing loose dirt and dust. Pay special attention to the wheels and undercarriage. These areas accumulate more dirt.
Using Car Shampoo
Next, apply car shampoo. Use a car-specific shampoo, not dish soap. Dish soap can harm your car’s paint. Mix the shampoo with water in a bucket. Follow the instructions on the shampoo bottle. Use a sponge or a soft mitt to apply the shampoo. Wash the car in sections. Start from the top. Move downwards in a gentle, circular motion. Rinse each section after washing. This prevents soap from drying on the paint. Dry the car with a clean, microfiber towel. This step is important to avoid water spots.
Claying The Paint
Is your car’s paint looking dull and old? You might be dealing with oxidation. But don’t worry, you can make it shine again with a bit of effort. One effective method is claying the paint. This process helps remove contaminants and leaves your car’s surface smooth. Let’s dive into why claying is beneficial and how you can do it yourself.
Benefits Of Claying
Claying your car might sound strange, but it’s a game-changer for your car’s paint. Here are some benefits:
Removes Contaminants: Claying helps remove dirt, tar, and other particles stuck on the paint.
Smooth Surface: After claying, the paint feels smooth and ready for waxing or polishing.
Improves Appearance: Your car looks shiny and new, making it stand out on the road.
Protects Paint: By removing harmful particles, you protect the paint from damage and extend its life.
Step-by-step Clay Bar Process
Ready to clay your car? Follow these simple steps:
Wash Your Car: Start with a clean car. Use car shampoo and water to remove loose dirt. Rinse and dry with a microfiber towel.
Prepare the Clay Bar: Take a small piece of clay bar and knead it until it’s soft and flat. It should be about the size of your palm.
Use a Lubricant: Spray a clay lubricant on a small section of the car. This helps the clay slide over the paint without scratching it.
Clay the Paint: Gently rub the clay bar over the lubricated area in straight lines. You’ll feel the clay picking up contaminants. If the clay gets dirty, fold it to use a clean side.
Wipe and Inspect: Wipe the area with a clean microfiber towel. Check the paint; it should feel smooth. Repeat the process on other sections of the car.
Finish Up: After claying the entire car, wash it again to remove any clay residue. Dry the car and admire your work!
Claying your car might seem like a lot of work, but it’s worth it. Your car will look fantastic, and you’ll feel proud knowing you did it by hand. Plus, it’s a great way to spend a sunny afternoon. Give it a try, and enjoy the results!
Applying The Rubbing Compound
Applying a rubbing compound is a crucial step in removing oxidation from car paint by hand. This process helps restore the car’s shine and removes the dull, chalky layer. It’s vital to choose the right compound and apply it correctly to achieve the best results.
Selecting The Right Compound
First, choose the correct rubbing compound for your car’s paint. Look for a product that suits your car’s paint type. There are compounds for clear coats, single-stage paints, and different levels of oxidation. Read the label carefully to ensure compatibility. Avoid overly abrasive compounds as they can damage the paint further.
Proper Application Technique
Applying the compound correctly ensures you get the best results. Start by washing and drying your car thoroughly. This removes dirt and debris. Use a clean, soft cloth or applicator pad. Apply a small amount of compound to the pad. Work on a small section of the car at a time.
Rub the compound in a circular motion with light to moderate pressure. Keep the pad moist with the compound to avoid scratching the paint. Buff each section until the oxidation is removed and the paint looks shiny. Wipe off any excess compound with a clean, dry cloth.
Repeat the process if necessary. After treating all affected areas, wash the car again. This removes any remaining residue. Dry the car with a soft towel. Applying a coat of wax after compounding helps protect the paint and restores its shine.
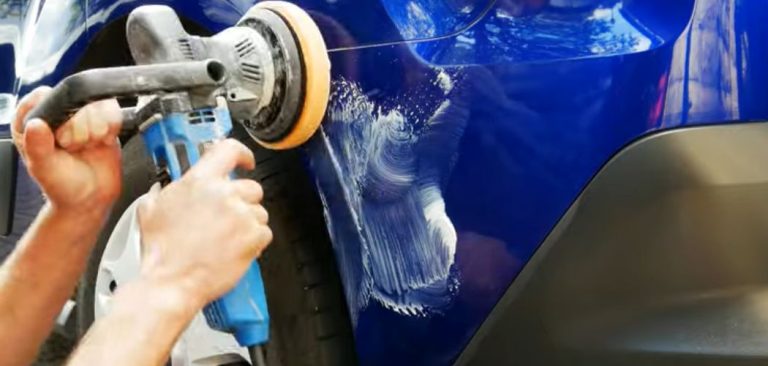
Polishing The Surface
Gently remove oxidation from car paint by hand using a clay bar or polish. Apply light pressure and circular motions. Wipe off residue with a clean microfiber cloth.
Polishing the surface of your car removes oxidation. It also restores shine. This is a crucial step in car maintenance. You can do it by hand with the right tools. Follow these steps to get the best results.
Choosing A Polish
Select a high-quality polish. It should be suitable for your car’s paint. Polishes come in various grades. Some are for light oxidation, others for heavy. Read the labels carefully. Choose the one that matches your needs.
Buffing By Hand
Apply a small amount of polish to a clean, soft cloth. Rub it onto the car’s surface in small, circular motions. Work on one section at a time. Apply even pressure. Continue until the polish starts to disappear. Buff the area with a clean cloth. Repeat these steps for the entire car. Take your time. Ensure every section is polished. This will bring back the car’s original shine.
Sealing The Paint
Once you’ve successfully removed the oxidation from your car paint, the next crucial step is sealing it. This step is like applying sunscreen before a day out in the sun. It helps protect your car’s paint from further damage and keeps it looking shiny and new. Let’s dive into why sealing is so important and how to do it right.
Importance Of Sealant
A sealant acts as a protective barrier between your car’s paint and the elements. Think about it: your car faces sun, rain, dirt, and pollution every day. Without a sealant, the paint can start to fade and deteriorate quickly. A good sealant ensures:
Protection: It shields the paint from UV rays, which can cause fading.
Longevity: It keeps the paint looking fresh and new for longer.
Smooth Finish: It gives your car a glossy, smooth finish that’s easy to clean.
In short, a sealant is your car’s best friend when it comes to maintaining its look and feel.
Applying The Sealant
Now that you know why sealing is essential, let’s get into how to apply it. Don’t worry, it’s easier than you might think!
Clean the Surface: Make sure your car is clean and dry. Any dirt or water can affect how well the sealant sticks.
Choose the Right Sealant: There are many types of sealants available. Pick one that’s suitable for your car’s paint type.
Apply a Small Amount: Put a small amount of sealant on a clean, soft cloth. You don’t need much; a little goes a long way.
Work in Sections: Apply the sealant in small sections. Use circular motions to ensure an even coat. This way, you cover every inch without missing spots.
Let it Dry: Allow the sealant to dry according to the instructions on the package. Usually, it takes about 10-15 minutes.
Buff the Surface: Use another clean, soft cloth to buff the surface. This step will bring out the shine and ensure a smooth finish.
And voila! Your car’s paint is now sealed and protected. Remember, sealing your car paint regularly can save you from costly repairs and keep your car looking brand new.
So, next time you think about skipping this step, ask yourself: do I want my car to look like it just rolled out of the showroom? If yes, then don’t forget to seal the paint!
Waxing For Protection
Waxing your car’s paint is crucial for protection after removing oxidation. It adds a layer of defense against dirt, UV rays, and other harmful elements. This process not only enhances the car’s shine but also maintains the paint’s integrity for a longer period.
Types Of Wax
There are two main types of wax: natural and synthetic. Natural wax, like carnauba, comes from palm leaves. It provides a deep, rich shine. Synthetic wax, made from polymers, offers longer-lasting protection. Choose the type based on your needs and preferences.
Wax Application Tips
Always start with a clean car. Dirt and debris can scratch the paint. Use a foam applicator pad to apply the wax. Work in small sections to ensure even coverage. Apply the wax in a circular motion. Let it dry to a haze before buffing it off with a microfiber cloth. Avoid waxing in direct sunlight. The heat can make the wax dry too fast, making it hard to remove.
Maintaining The Finish
After you’ve successfully removed the oxidation from your car paint, the job isn’t quite finished. To keep your car looking as good as new, maintaining the finish is crucial. A proper maintenance routine will ensure the shine lasts longer, and your car remains protected against future oxidation. Let’s dive into some simple yet effective steps you can take to keep that finish looking pristine.
Regular Cleaning
Think of your car as an investment. Regular cleaning is essential to protect this investment. Dirt and grime can stick to your car’s surface, leading to premature wear and tear. Cleaning your car regularly helps in removing these contaminants.
Use a gentle car wash soap: Avoid household detergents. They can strip away the wax and damage the paint.
Wash with a microfiber cloth: Microfiber is gentle and effective. It won’t scratch the surface.
Rinse thoroughly: Ensure all soap is washed off to prevent residue build-up.
A clean car not only looks good but also keeps oxidation at bay. Try to wash your car every two weeks. It’s a small effort for a big reward.
Periodic Inspections
Just like visiting a doctor for regular check-ups, your car needs periodic inspections too. This helps in spotting early signs of oxidation or any other damage.
Here’s a simple inspection checklist:
Check for dull spots: These can be early signs of oxidation.
Look for scratches: These can lead to rust if not treated.
Inspect the wax coating: Make sure it’s intact and reapply if necessary.
Think of these inspections as a way to catch problems before they become big headaches. If you find any issues, address them immediately. It’s like dealing with a small leak before it turns into a flood.
Final Thoughts
Maintaining the finish on your car might seem like a chore, but it’s worth it. Regular cleaning and inspections go a long way in preserving the beauty and value of your vehicle. Think of it as giving your car the spa treatment it deserves!
Remember, a little effort today can save you a lot of trouble tomorrow. Keep that car shining, and enjoy the ride!
Frequently Asked Questions
What Is The Best Way To Remove Oxidation From Car Paint?
Use a clay bar and polishing compound to remove oxidation from car paint. Apply car wax for protection.
Does Wd-40 Remove Oxidation On Car Paint?
WD-40 can remove light oxidation from car paint. Apply a small amount, rub gently, and then wash off.
Can Oxidized Car Paint Be Restored?
Yes, oxidized car paint can be restored. Use a clay bar, followed by a polishing compound, and finish with wax. This process removes oxidation and restores shine.
What Home Remedies Can I Use For Oxidized Paint?
To treat oxidized paint, use a mixture of baking soda and water. Apply it with a soft cloth. For stubborn spots, try vinegar. Rinse thoroughly and dry. Wax your car to restore shine and protect the paint. These remedies are simple and effective.